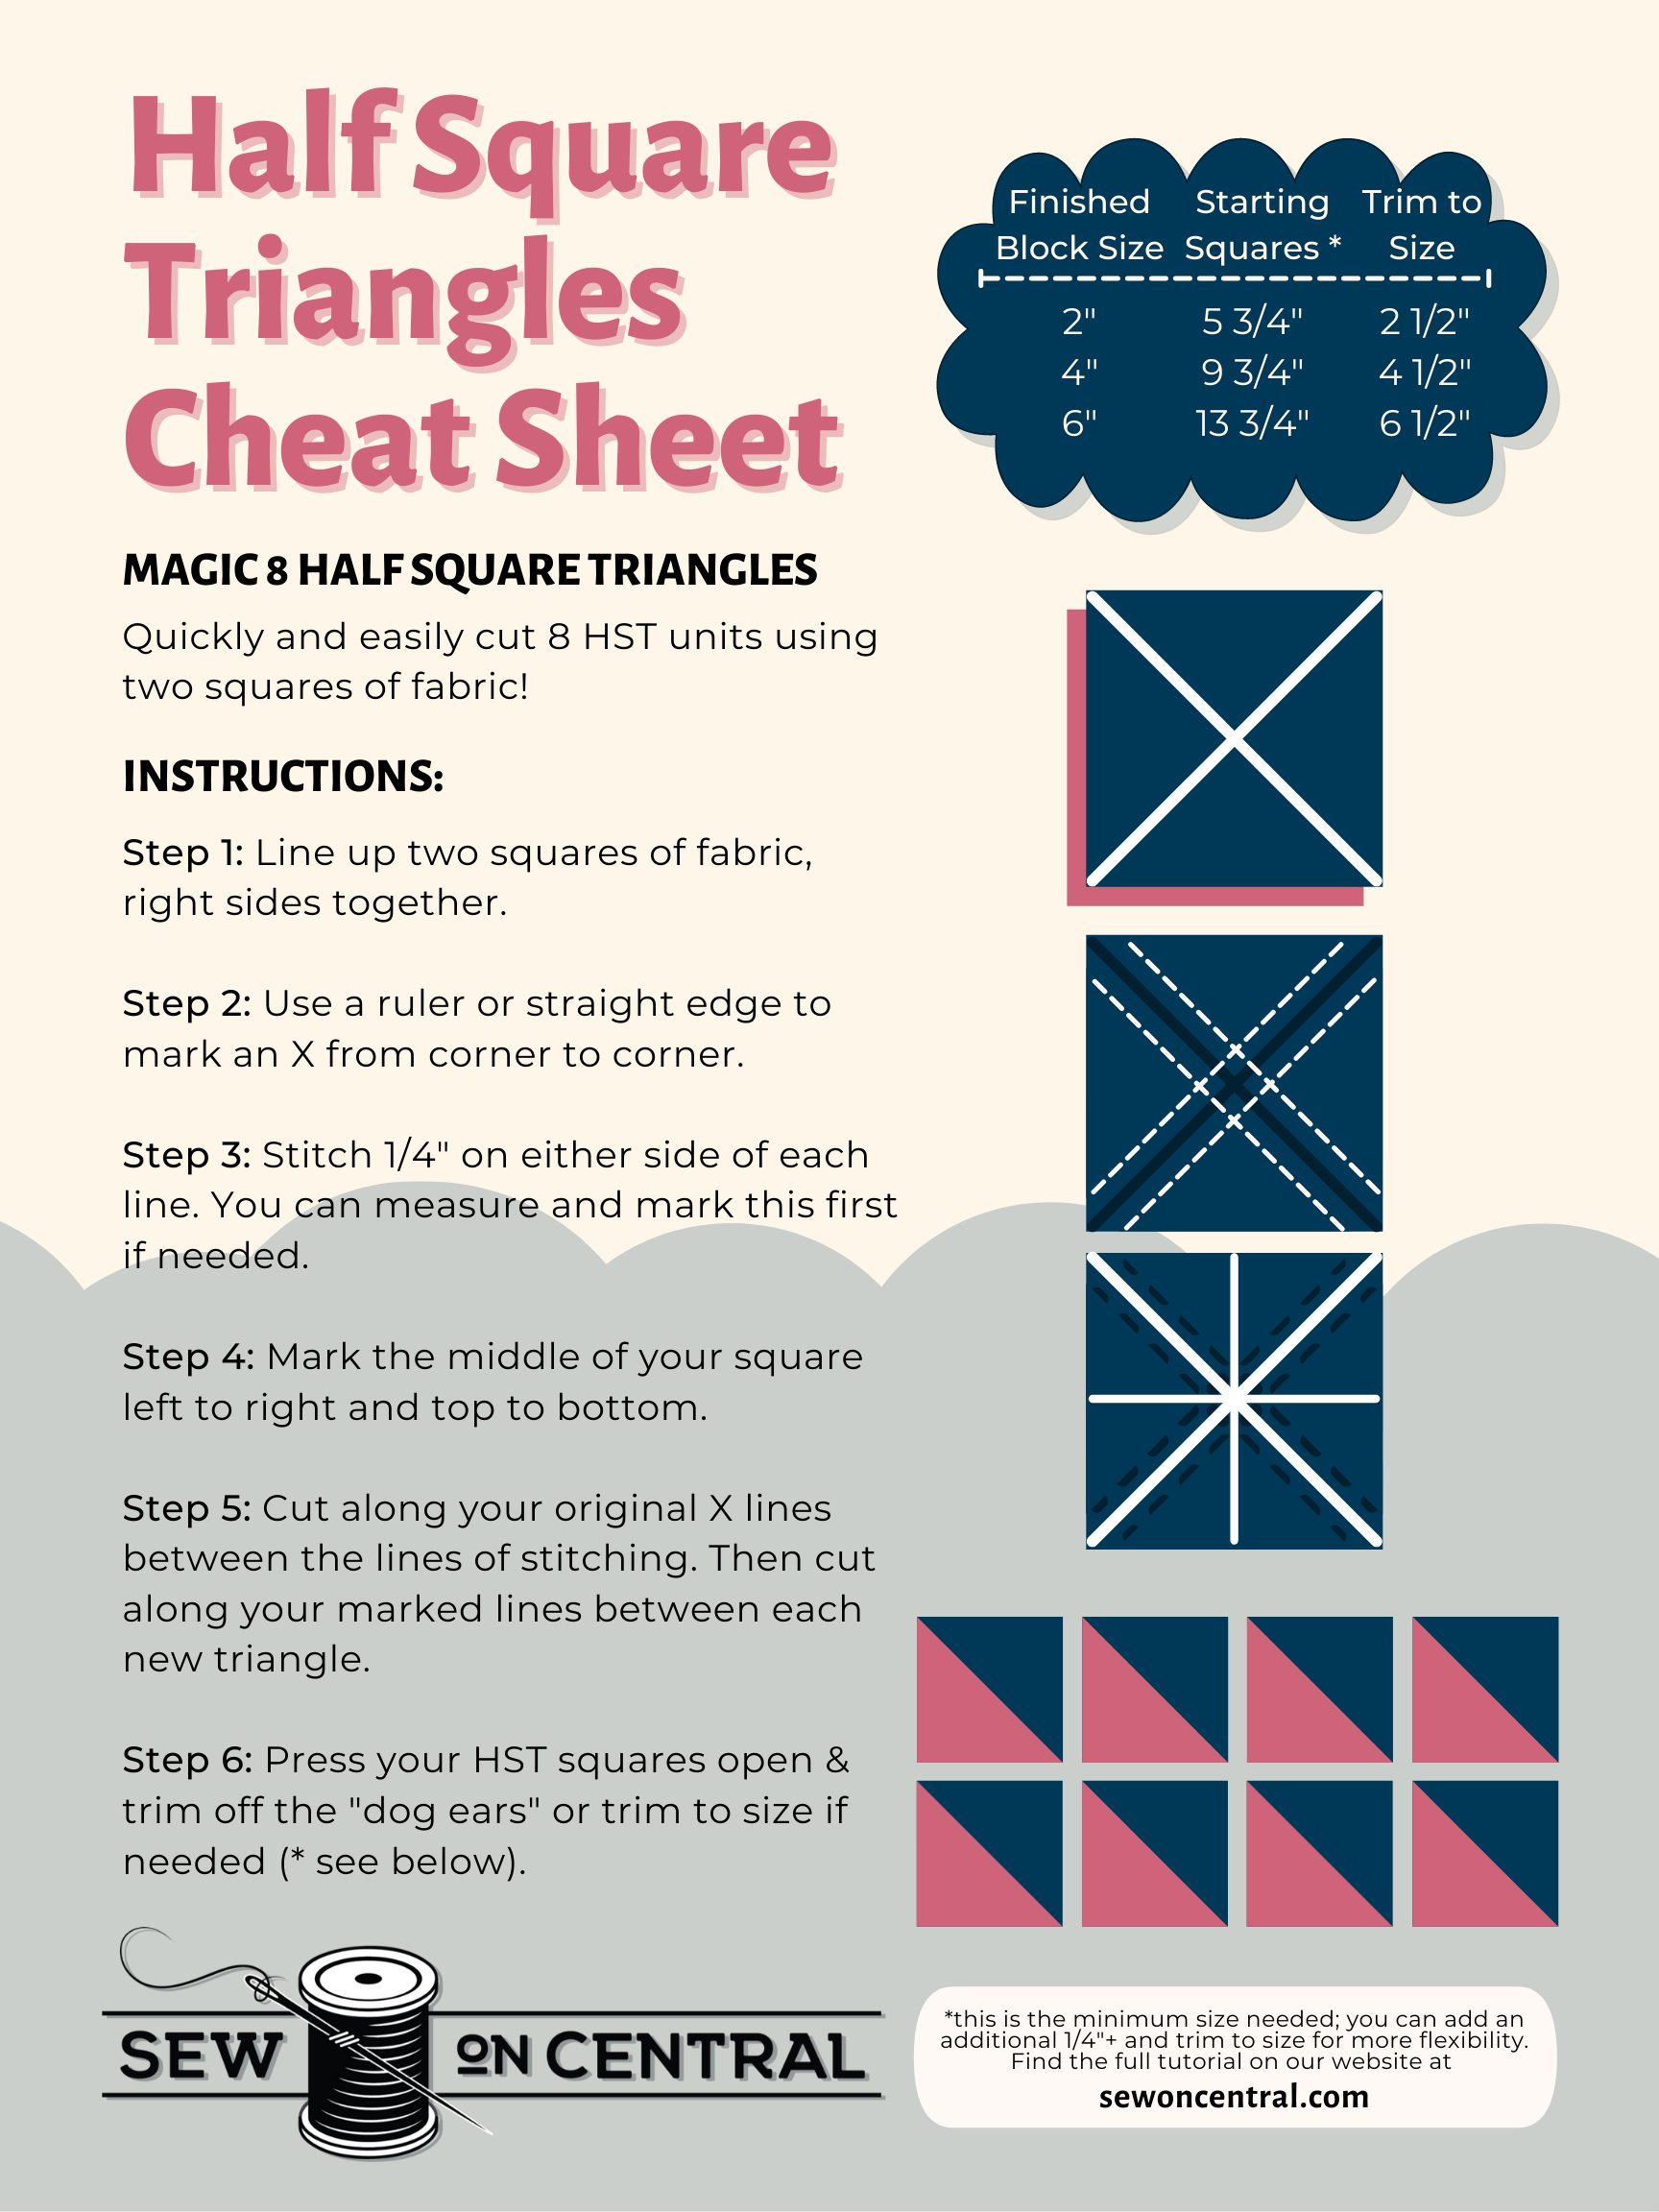
Magic 8: Half Square Triangles Made Easy!

Let’s sew some Half Square Triangles!
Half Square Triangles (HST) are patchwork squares with two equal right-angle triangles creating the square. They are an integral part of many quilting blocks, and a quick and easy way for a novice quilter to step up their quilting game! There are a few methods for creating HST, but this one creates eight HSTs at once, making quick work of your next quilt.
Follow our tutorial below, and save the “Cheat Sheet” and Size Guide to your phone or computer for a handy reference guide and refresher later.
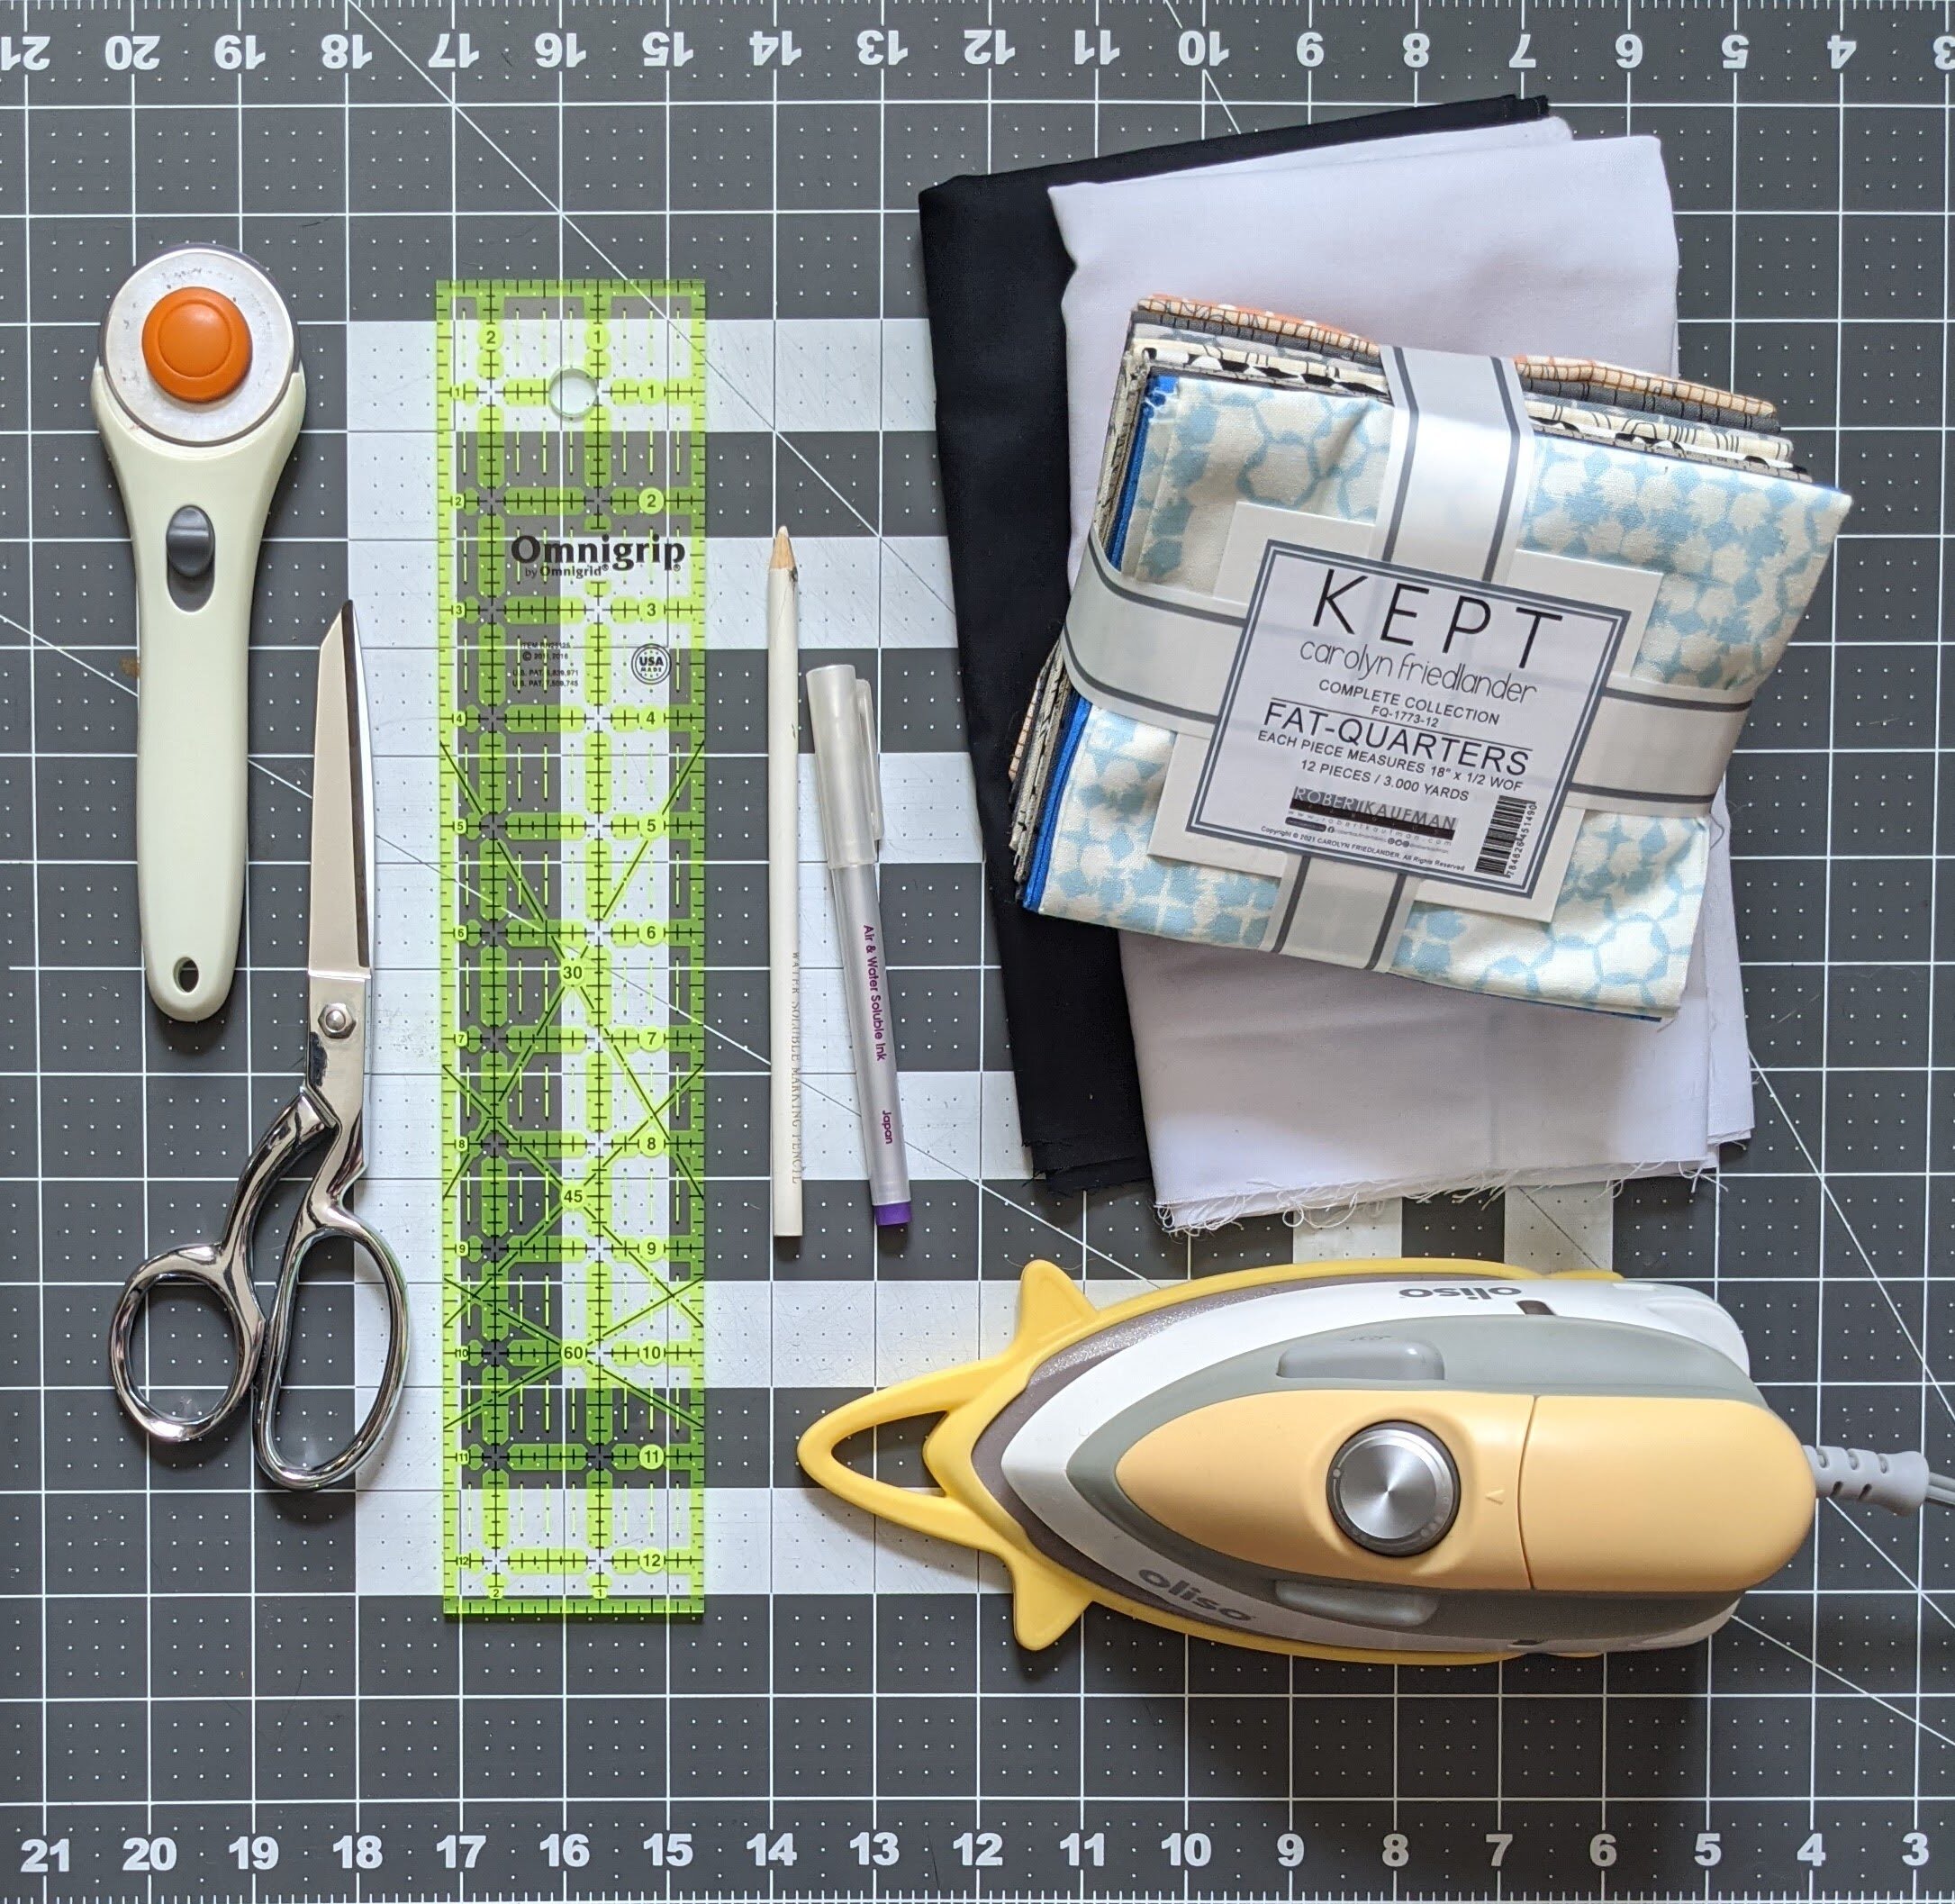
Gather Your Supplies
Supplies Needed:
- Fabric
- Sewing Machine
- Ruler/Straight Edge
- Fabric
- Pen/Pencil/Chalk
- Cutting Tools - a rotary cutter and cutting mat is recommended!
- Iron
We’re using Carolyn Friedlander’s Kept Fat Quarter Bundle and Paintbrush Studio’s Painter’s Palette Solids in Ebony. You can find all of our available FQ bundles here or solids here!
Work out your measurements before you cut anything!
This is the trickiest part, and it does involve some math. Start with the final size you want the HST patchwork square to be. For the “Magic 8” method, double that number and add 1+3/4 inches. This accounts for the seam allowances both in the method and in your final HST patchwork square.
(Finished Block Size x 2) + 1.75
If you’re looking for both accuracy and flexibility in the margin for error, you can add an additional 1/4” and plan to trim each of your blocks down to size when you’re done. This method may be more precise, but also creates more waste in the fabric trimmings.
Did we lose you yet? Don’t worry, here’s a handy Size Chart below for some common HST patchwork block sizes.

Right-click to save the image or download the PDF for reference later!

For the following example, we’re looking for a finished size of 3 inches for our HST squares, so we’re starting with our fabric at 7.75 x 7.75”.
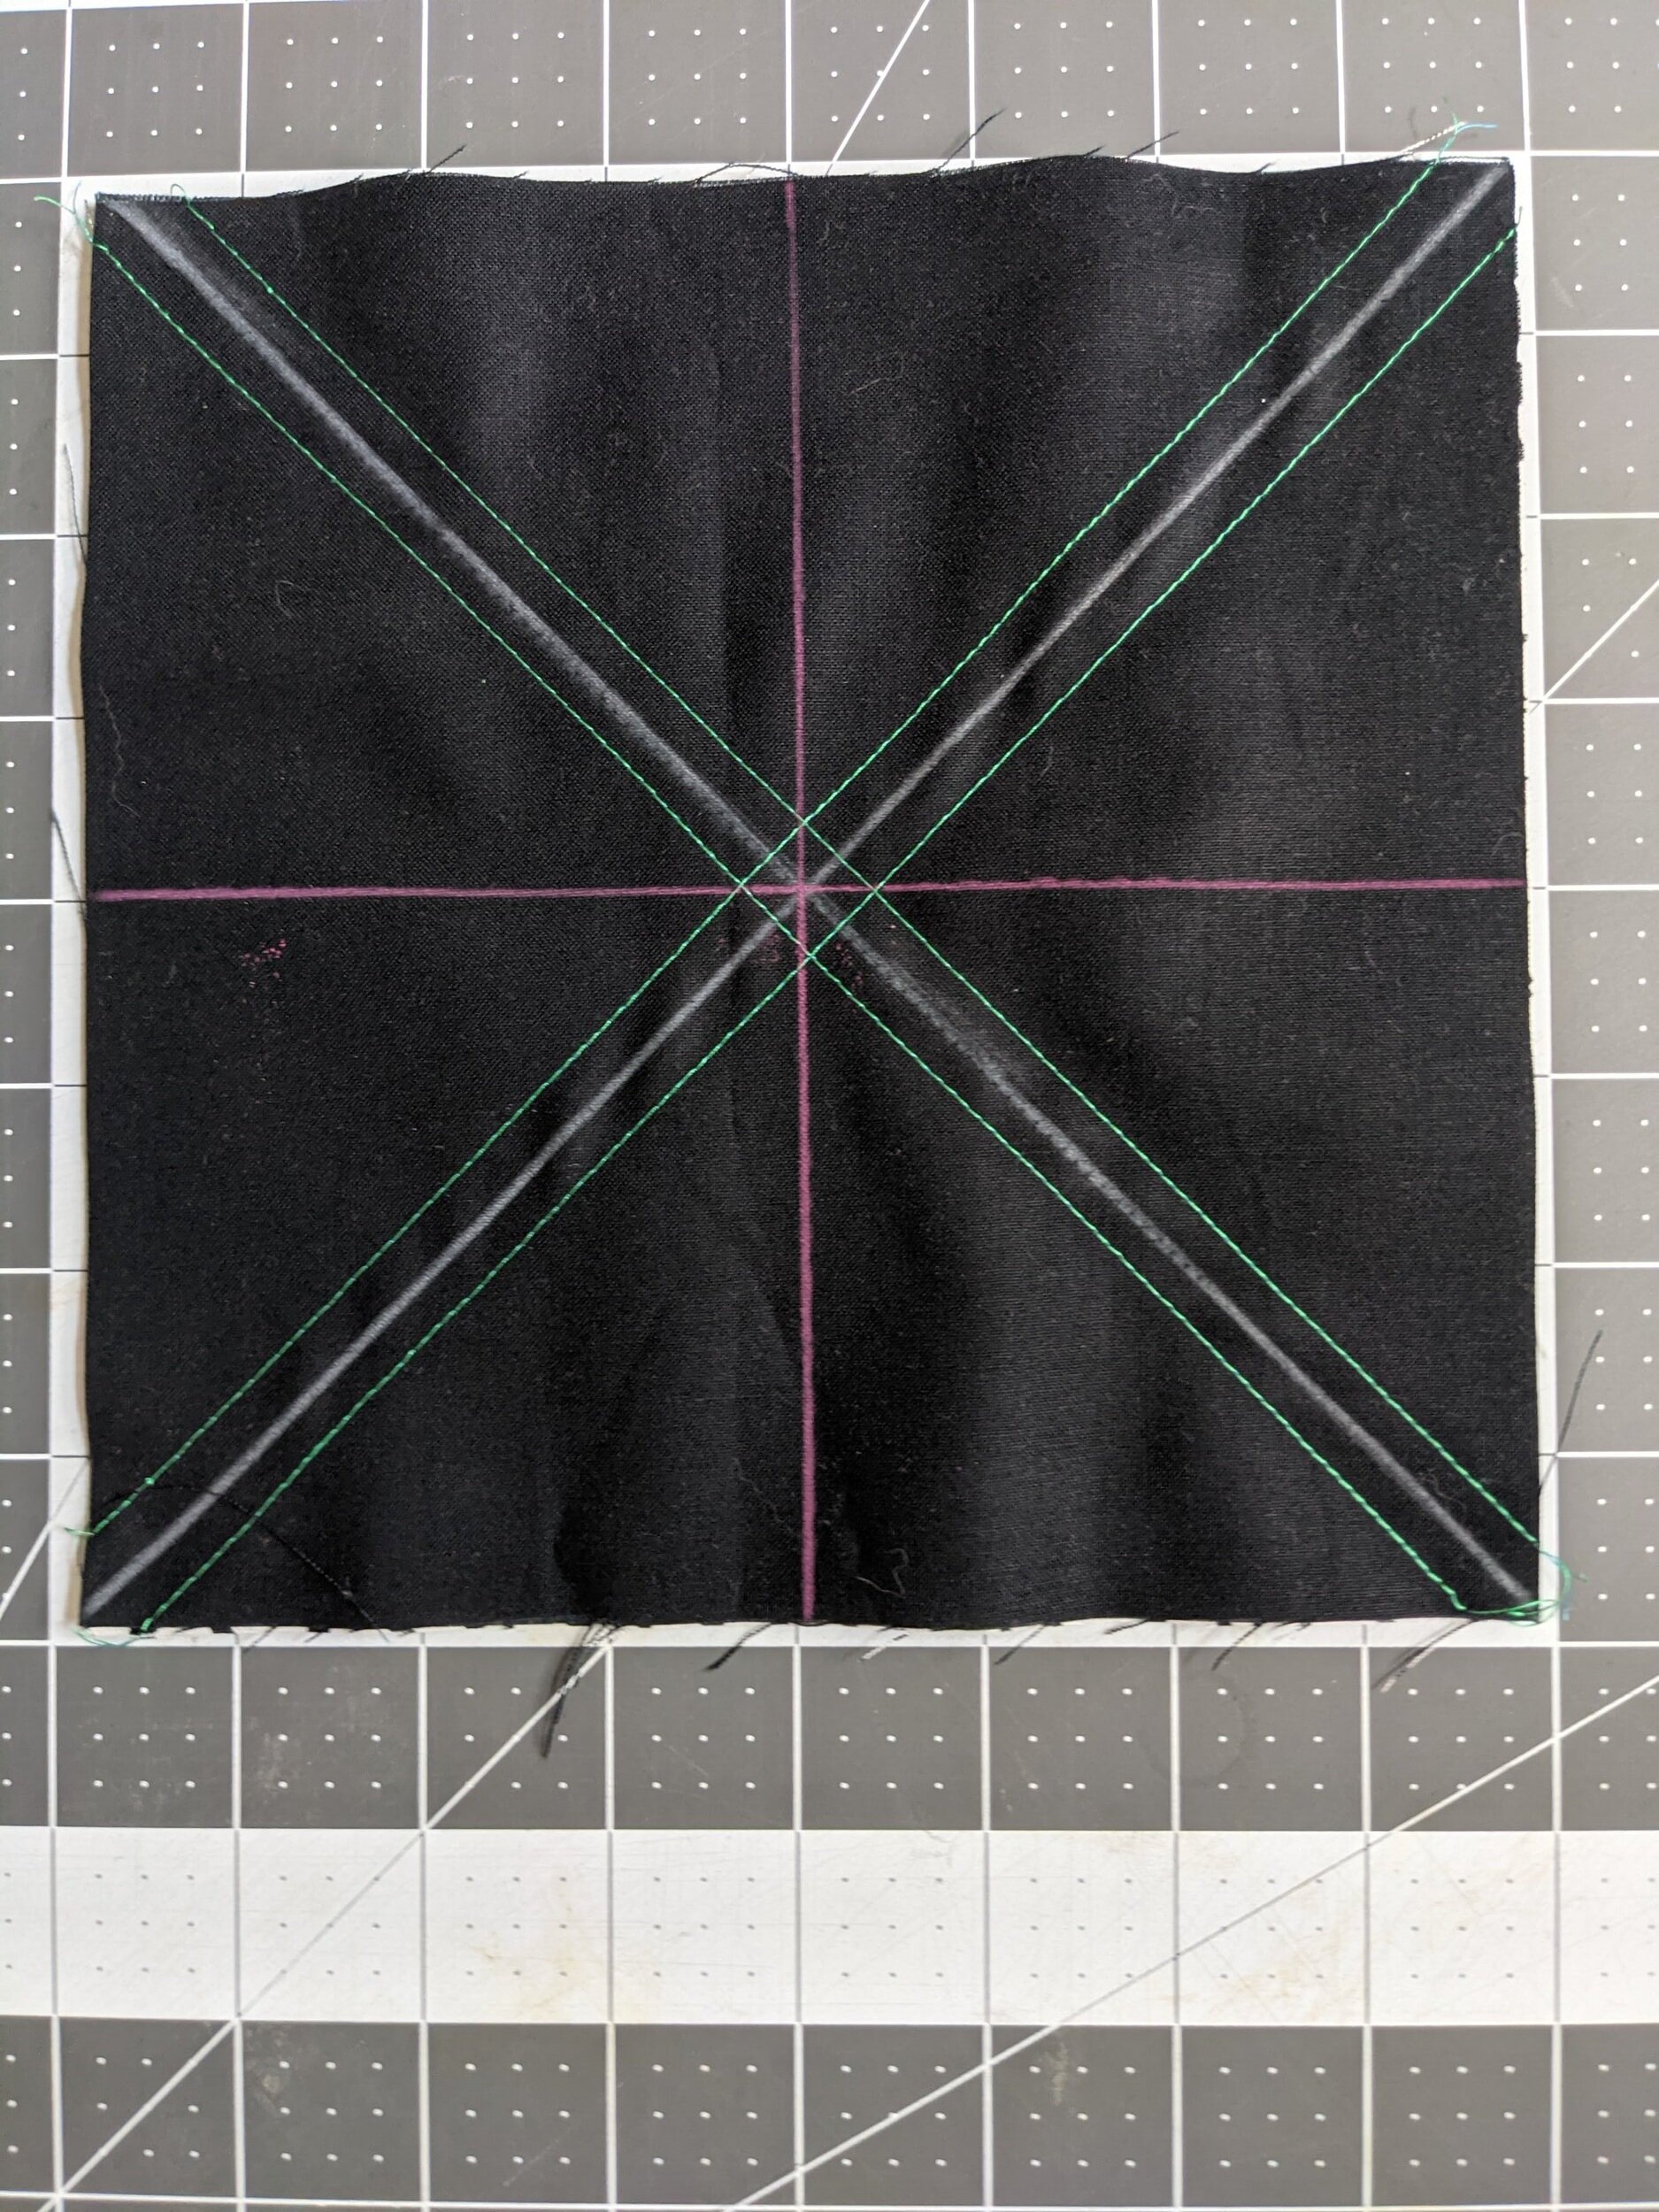
Step 1: Select your fabric. Contrasting fabrics work best for this. Cut your two squares of fabric to size, squaring up all sides. Then line up the two squares one on top of the other, right sides together. Pin them together.
Step 2: Use a ruler or straight edge to mark an X from corner to corner.
Step 3: Stitch 1/4" on both sides of each line. Double check with a ruler that your needle lines up at the 1/4” mark before you begin sewing. You can measure 1/4” on each side of each line and mark this first if needed.


Step 4: Give your squares a quick press with the iron to prevent any puckers. Mark the middle of your square left to right and top to bottom.
Step 5: Cut along your original X lines between the lines of stitching. Then cut along your marked lines between each new triangle.

Step 6: Press your HST squares open with the iron. Trim off the "dog ears" and square up any rough sides or corners if needed. If you’d added the additional quarter inch, trim each square to size.
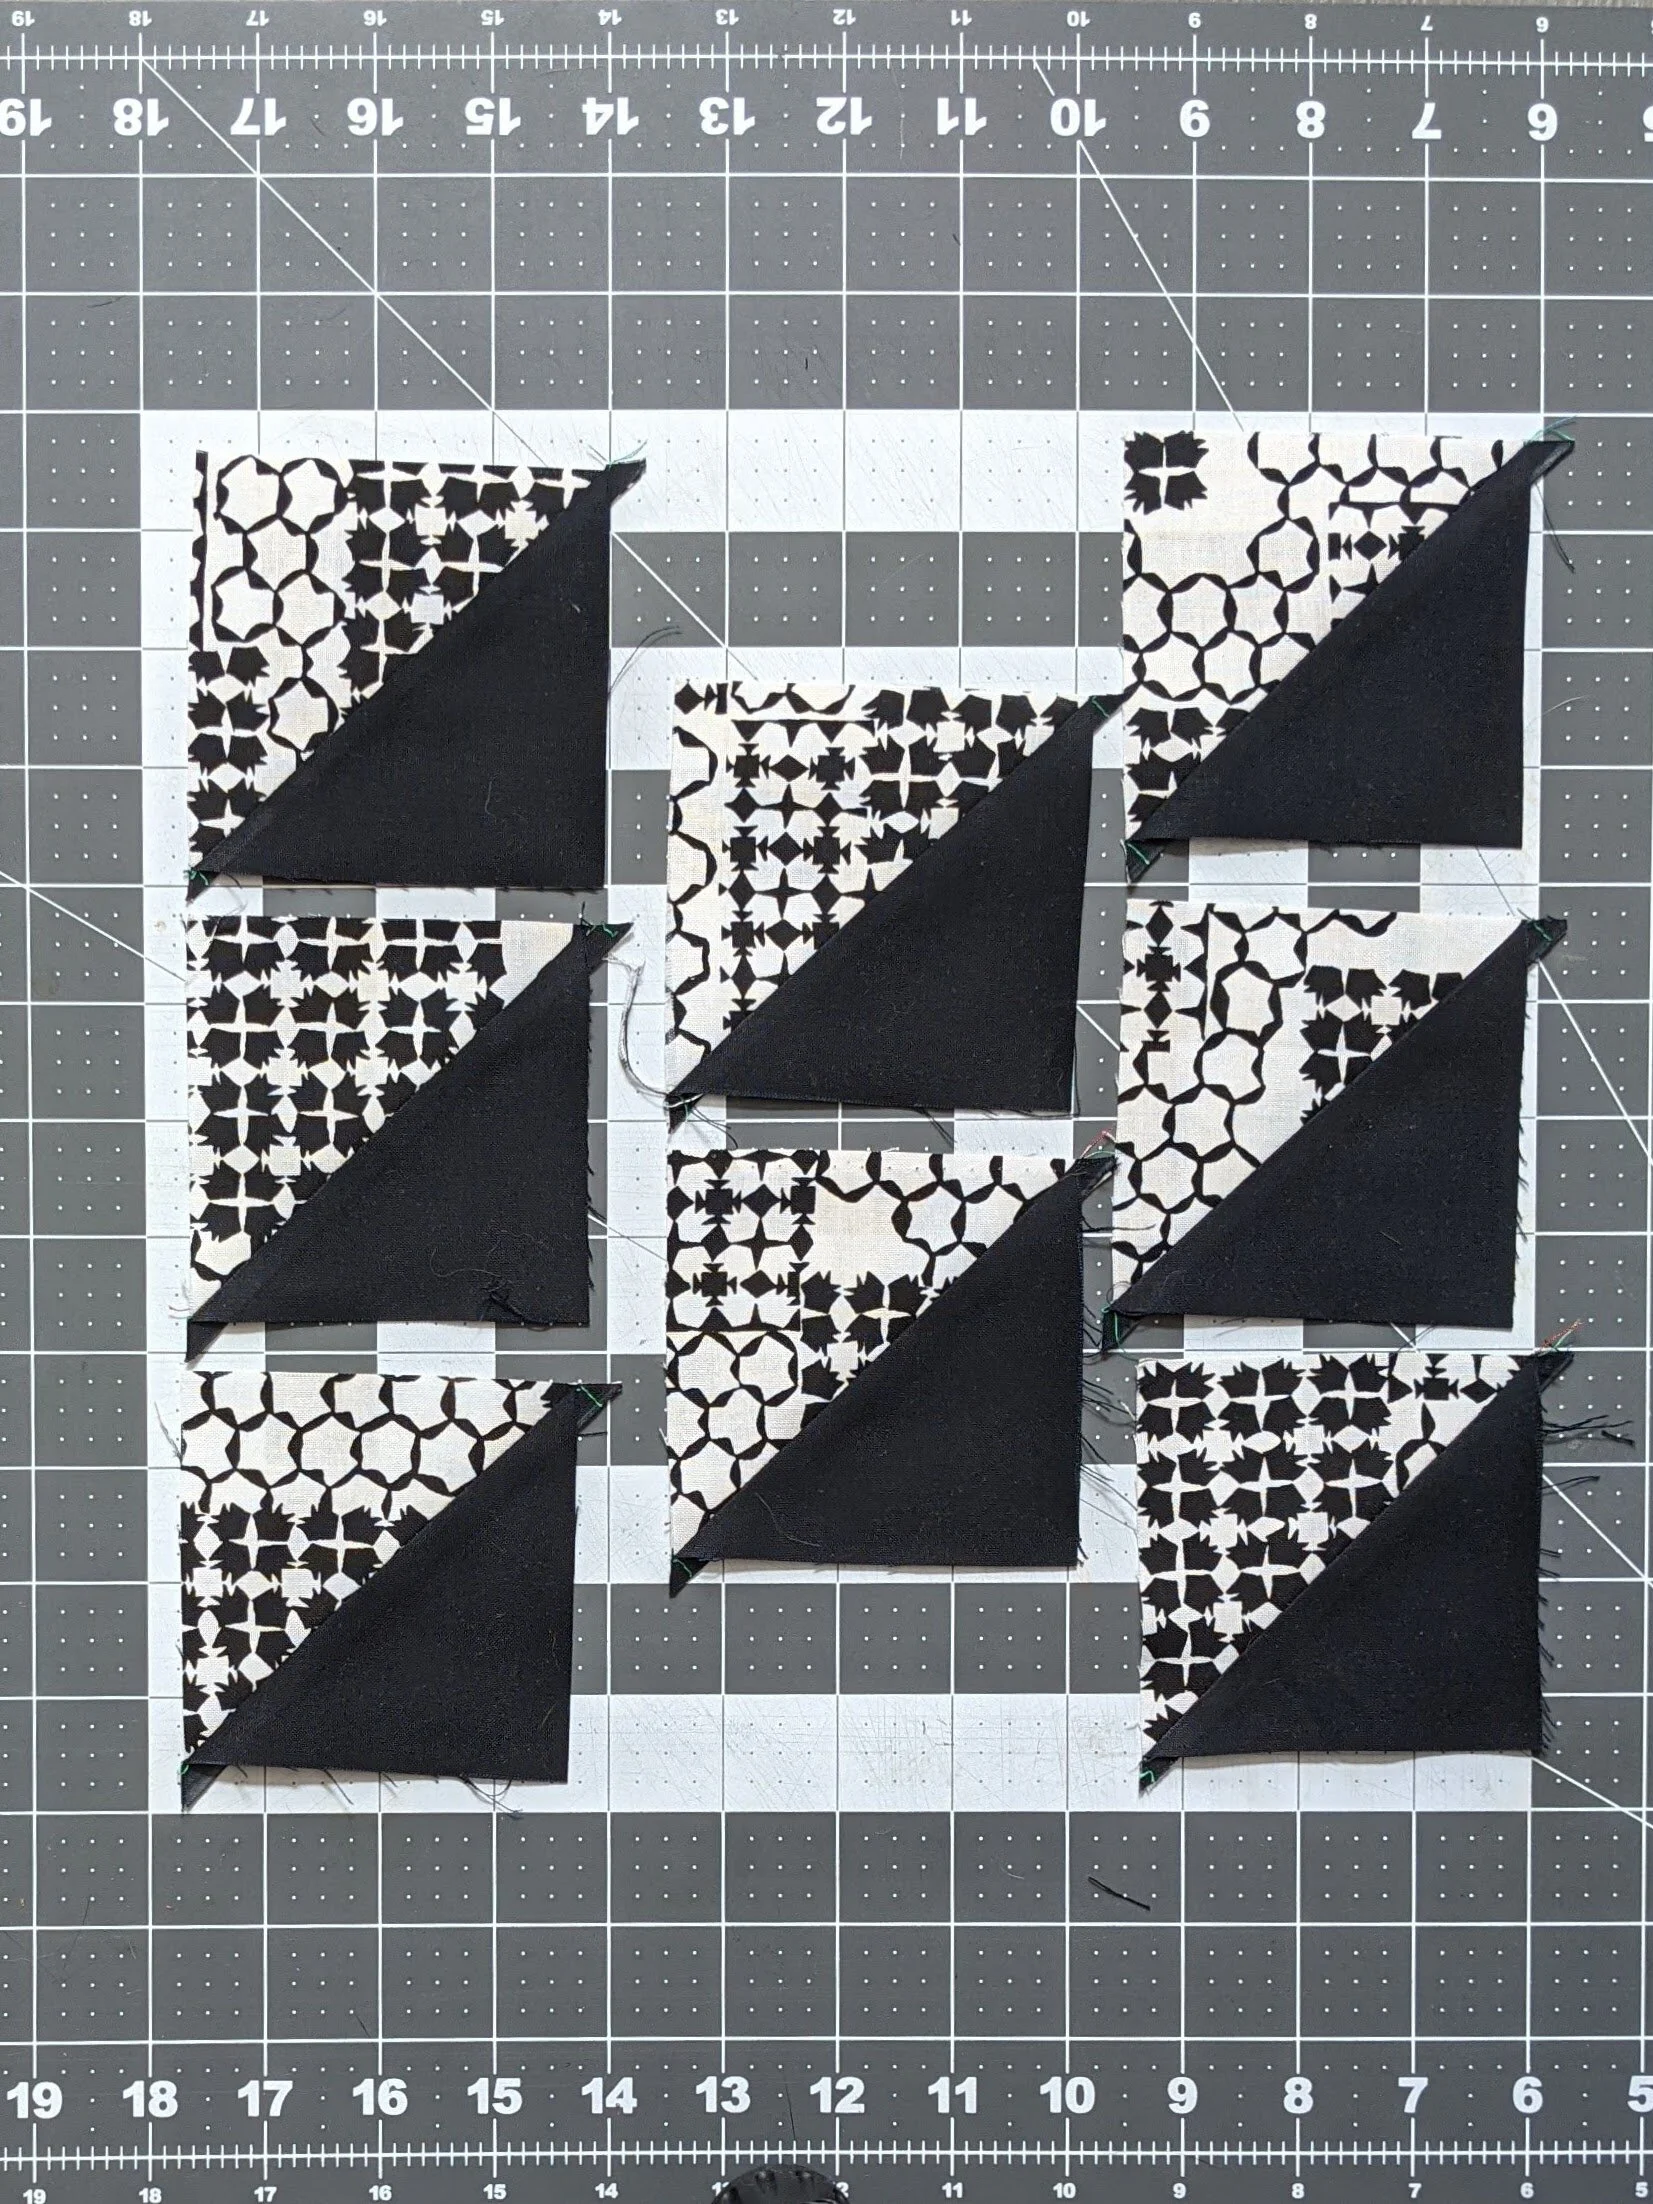
Pressed!

Trimmed!
And there you have it! Quick and easy Magic 8 Half Square Triangles. Save the poster below to keep on hand for your next quilting project!
Click here to download the PDF! or right click on the poster above to save it to your computer or phone for a quick and easy refresher on HSTs!